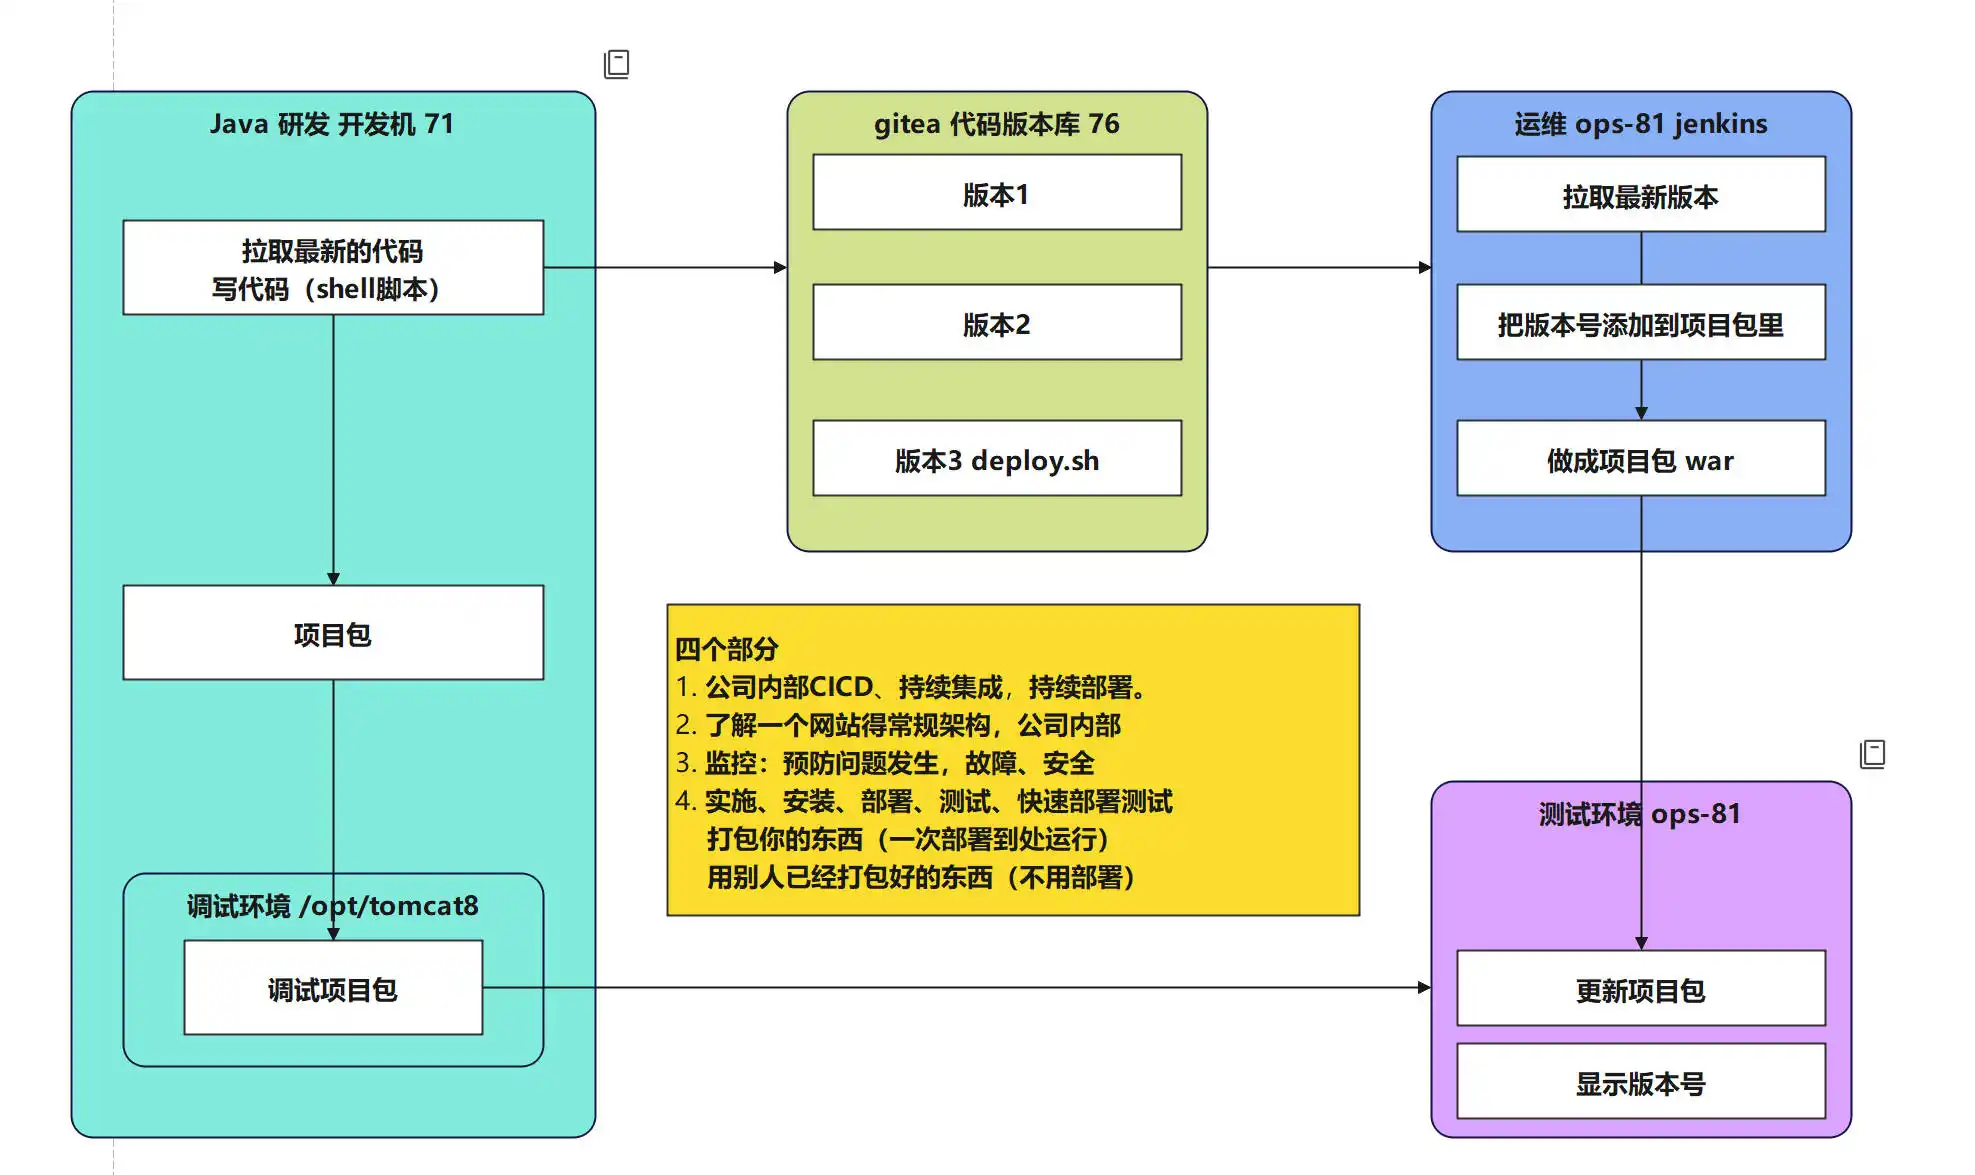
研发代码仓库(gitee)及使用git代码上传过程

一、gitee代码仓库使用
注册账号、创建仓库,我这里创建的试验仓库为:jx1206。
创建好之后会有一个详细的代码上传、下载教程。
二、使用git做版本控制
使用《传统运维技术篇01》中的开发服务器和运维服务器安装git 软件。
# yum install -y git 首先将开发服务器上/opt/virstu目录名称改为仓库名称jx1206,然后初始化git ,根据gitee 仓库内说明配置全局环境。
mv /opt/virstu /opt/jx1206
[root@jx-dev-71 jx1206]# git init
Initialized empty Git repository in /opt/jx1206/.git/
目录内文件结构如下:
[root@jx-dev-71 jx1206]# ls -la
total 8
drwxr-xr-x 5 root root   75 Dec  6 19:01 .
drwxr-xr-x 7 root root  224 Dec  6 18:55 ..
drwxr-xr-x 8 root root  166 Dec  6 19:04 .git
-rw-r--r-- 1 root root 3032 Dec  6 19:01 pom.xml
-rw-r--r-- 1 root root   47 Jun 15  2022 README.md
drwxr-xr-x 3 root root   18 Jun 15  2022 src
drwxr-xr-x 7 root root  147 Dec  6 16:29 target
除了target文件夹不用上传,其他文件放置到暂存区
[root@jx-dev-71 jx1206]# git add pom.xml
[root@jx-dev-71 jx1206]# git add README.md
[root@jx-dev-71 jx1206]# git add src/
查看此时状态:
[root@jx-dev-71 jx1206]# git status .
On branch master

No commits yet

Changes to be committed:
  (use "git rm --cached <file>..." to unstage)
	new file:   README.md
	new file:   pom.xml
	new file:   src/main/java/com/jx/virstu/DemowarApplication.java
	new file:   src/main/java/com/jx/virstu/ServletInitializer.java
	new file:   src/main/java/com/jx/virstu/controller/TestController.java
	new file:   src/main/resources/application.properties
	new file:   src/main/webapp/WEB-INF/cgi/a.sh
	new file:   src/main/webapp/a.html

Untracked files:
  (use "git add <file>..." to include in what will be committed)
	target/
添加代码变更说明
[root@jx-dev-71 jx1206]# git commit -m '添加代码'
*** Please tell me who you are.

Run

  git config --global user.email "you@example.com"
  git config --global user.name "Your Name"

to set your account's default identity.
Omit --global to set the identity only in this repository.

fatal: unable to auto-detect email address (got 'root@jx-dev-71.(none)')
这里提示你需要先配置gitee注册的用户名和密码
  git config --global user.email "you@example.com"
  git config --global user.name "Your Name"
添加完成后重新提交:
[root@jx-dev-71 jx1206]# git commit -m '添加代码'
[master (root-commit) d1bc26a] 添加代码
 8 files changed, 151 insertions(+)
 create mode 100644 README.md
 create mode 100644 pom.xml
 create mode 100644 src/main/java/com/jx/virstu/DemowarApplication.java
 create mode 100644 src/main/java/com/jx/virstu/ServletInitializer.java
 create mode 100644 src/main/java/com/jx/virstu/controller/TestController.java
 create mode 100644 src/main/resources/application.properties
 create mode 100755 src/main/webapp/WEB-INF/cgi/a.sh
 create mode 100644 src/main/webapp/a.html
查看提交日志:
[root@jx-dev-71 jx1206]# git log
commit d1bc26adcf1020f2e9a8b0565a2c6fae0c29db0f (HEAD -> master)
Author: smith <1398539507@qq.com>
Date:   Fri Dec 6 18:59:10 2024 +0800
此时还可以做代码变更:
更改pom.xml,在最后面添加一条注释:
vi pom.xml
<!-- 这是一个注释 -->
查看此时状态,发现pom.xml已经被编辑。
[root@jx-dev-71 jx1206]# git status .
On branch master
Changes not staged for commit:
  (use "git add <file>..." to update what will be committed)
  (use "git restore <file>..." to discard changes in working directory)
	modified:   pom.xml

Untracked files:
  (use "git add <file>..." to include in what will be committed)
	target/

no changes added to commit (use "git add" and/or "git commit -a")
对比两次文件有什么不同?
[root@jx-dev-71 jx1206]# git diff pom.xml
diff --git a/pom.xml b/pom.xml
index f14ea50..3d87d34 100644
--- a/pom.xml
+++ b/pom.xml
@@ -85,3 +85,4 @@
     </build>

 </project>
+<!-- 这是一个注释 -->
把修改过的pom.xml文件添加到暂存区,并添加变更信息。
[root@jx-dev-71 jx1206]# git add pom.xml
[root@jx-dev-71 jx1206]# git status .
On branch master
Changes to be committed:
  (use "git restore --staged <file>..." to unstage)
	modified:   pom.xml

Untracked files:
  (use "git add <file>..." to include in what will be committed)
	target/

[root@jx-dev-71 jx1206]# git commit -m '增加了一行'
[master 0611a11] 增加了一行
 1 file changed, 1 insertion(+)
然后我们将已有代码全部推送到远程仓库jx1206中,这里需要验证用户名和密码。
[root@jx-dev-71 jx1206]# git remote add origin https://gitee.com/smithlee/jx1206.git
[root@jx-dev-71 jx1206]# git push -u origin "master
Enumerating objects: 24, done.
Counting objects: 100% (24/24), done.
Delta compression using up to 2 threads
Compressing objects: 100% (15/15), done.
Writing objects: 100% (24/24), 2.97 KiB | 1.48 MiB/s, done.
Total 24 (delta 2), reused 0 (delta 0), pack-reused 0
remote: Powered by GITEE.COM [1.1.5]
remote: Set trace flag 214103b7
To https://gitee.com/smithlee/jx1206.git
 * [new branch]      master -> master
查看远程仓库配置:
[root@jx-dev-71 jx1206]# git remote -v 至此,暂存区清空,从本地将代码推送到远程仓库完成!
git 撤回功能(工作区目录内)
git 撤回,在修改文件时,如果想恢复之前的修改,可以使用以下命令:
git checkout 文件路径或者"."
"." 代表当前目录所有有变动的文件。
例如:改动pom.xml文件,查看当前状态:
[root@jx-dev-71 jx1206]# git status .
On branch master
Your branch is up to date with 'origin/master'.

Changes not staged for commit:
  (use "git add <file>..." to update what will be committed)
  (use "git restore <file>..." to discard changes in working directory)
	modified:   pom.xml

Untracked files:
  (use "git add <file>..." to include in what will be committed)
	target/

no changes added to commit (use "git add" and/or "git commit -a")
使用撤回功能:
git checkout /opt/jx1206/pom.xml再次查看当前状态:
[root@jx-dev-71 jx1206]# git checkout /opt/jx1206/pom.xml
Updated 1 path from the index
[root@jx-dev-71 jx1206]# git status .
On branch master
Your branch is up to date with 'origin/master'.

Untracked files:
  (use "git add <file>..." to include in what will be committed)
	target/

nothing added to commit but untracked files present (use "git add" to track)
文件已恢复上一个状态。
如果文件已经提交到暂存区,那么可以使用以下命令撤回操作。
# 撤回某个文件
git reset <file>
# 撤回所有
git reset
换句话说,文件还是会保留在工作区,只是它们不再处于暂存状态。
举例:
从工作区修改pom.xml文件,然后查看当前状态,之后提交到暂存区,再撤回操作,再查看当前状态。会发现第一次修改状态是绿色标记,第二次撤回后变成红色标记说明已成功撤回。
[root@jx-dev-71 jx1206]# vi pom.xml
[root@jx-dev-71 jx1206]# git add pom.xml
[root@jx-dev-71 jx1206]# git status .
On branch master
Your branch is up to date with 'origin/master'.

Changes to be committed:
  (use "git restore --staged <file>..." to unstage)
	modified:   pom.xml

Untracked files:
  (use "git add <file>..." to include in what will be committed)
	target/

[root@jx-dev-71 jx1206]# git reset pom.xml
Unstaged changes after reset:
M	pom.xml
[root@jx-dev-71 jx1206]# git status .
On branch master
Your branch is up to date with 'origin/master'.

Changes not staged for commit:
  (use "git add <file>..." to update what will be committed)
  (use "git restore <file>..." to discard changes in working directory)
	modified:   pom.xml

Untracked files:
  (use "git add <file>..." to include in what will be committed)
	target/

no changes added to commit (use "git add" and/or "git commit -a")
三、使用git下载远程仓库的代码
我们使用运维服务器搭建和开发服务器一样的软件环境,然后下载git软件,将远程仓库jx1206中代码全部拉下来,部署应用。
git clone https://gitee.com/smithlee/jx1206.git目录结构如下:
[root@jx-ops-81 jx1206]# ls
pom.xml  README.md  src
使用mvn打包源码生成war包,复制war包到tomcat的webapps目录下,并启动tomcat程序。
# mvn package
# cp /opt/jx1206/target/virstu.war /opt/tomcat8/webapps/ROOT.war
# /opt/tomcat8/bin/startup.sh
服务器上测试业务成功
curl localhost/a.html
curl localhost/cgi-bin/a.sh
现在需要笔记本访问服务器内业务和运维机访问方式一致。也需要在网关服务器上添加DNAT规则。
访问流程:笔记本->127.0.0.1 8180 -> 10.0.3.15 8180 -> 10.10.10.81 80
iptables -t nat -A PREROUTING -d 10.0.3.15/32 -p tcp -m tcp --dport 8180 -j DNAT --to-destination 10.10.10.81:80别忘了在virtualbox上网关服务器nat网卡配置上添加端口转发规则:
设置-》网络-》nat网卡-》高级-》端口转发
主机ip:127.0.0.1 主机端口:8180 子系统端口:8180
配置完成后可以在浏览器中测试:
http://127.0.0.1:8180/a.html
http://127.0.0.1:8180/cgi-bin/a.sh
远程仓库代码有变动时,本地仓库该如何更新代码?
使用开发服务器修改pom.xml文件然后git push 到gitee。我们使用运维服务器将更新的代码拉取到本地,以便更新本地代码。
由于我们之前使用git clone 将远程仓库整个克隆下来。后续有代码变动不用再次克隆,只需拉取改动的即可。
注意:如果出现本地代码更改后没有上传到远程仓库,会导致两个版本不一致。这时要确定修改的文件是在工作区还是暂存区。如果是在工作区可以使用git checkout 文件所在路径撤回更改,如果是在暂存区可以使用git reset 文件所在路径撤回更改。然后使用git pull --all 拉取远程仓库代码到本地。


评论区